Friday, June 28, 2013

How to Root Samsung Galaxy S I 9000

How to root Samsung I9000 Galaxy S i9000 and install CWM recovery


Phone features

  • 2G Network GSM 850 / 900 / 1800 / 1900
  • 3G Network HSDPA 900 / 1900 / 2100
  • SIM Mini-SIM
  • Announced 2010, March
  • Super AMOLED capacitive touchscreen, 16M colors
  • Size 480 x 800 pixels, 4.0 inches (~233 ppi pixel density)
  • Multitouch Corning Gorilla Glass (TouchWiz 3.0 UI)
  • MEMORY Card slot microSD, up to 32 GB
  • Internal 8/16 GB storage, 512 MB RAM, 2 GB ROM
  • Wi-Fi 802.11 b/g/n, DLNA, Wi-Fi hotspot (Android 2.2)
  •  microUSB v2.0
  • 5 MP camera, 2592 x 1944 pixels, autofocus, check quality with Geo-tagging, touch focus, face and smile detection
  • OS Android OS, v2.1 (Eclair), upgradable to v2.3 (Gingerbread)
  • Chipset Hummingbird
  • CPU 1 GHz Cortex-A8
  • GPU PowerVR SGX540
  • Sensors Accelerometer, proximity, compass
  • Radio FM radio with RDS
  • Colors Black, White
  •  ISDB-Tb Digital TV tuner (only available for Brazilian market)
  • Li-Ion 1500 mAh battery
  • Stand-by Up to 750 h (2G) / Up to 576 h (3G)

Rooting Procedure

Warning: Rooting voids the warranty. So be careful while following the steps to root. Any mistakes while rooting can cause the damage of the device.
Disclaimer: We are not the developers. If anything happens to your phone while performing mentioned tutorial then don’t blame us. And this ROM is not developed by us so if some functionality is not working then it’s not our responsibility. Follow the tutorial as per your own risk

Before you begin:

  • Make sure your mobile should possess 70 to 80% battery.
  •  Enable USB Debugging mode. Go to Menu > Settings > Manage Applications > Development > USB Debuggingcheck box
  • Install Root Samsung Galaxy S GT-I9000 USB drivers. Download USB drivers or download Samsung Kies (drivers included)
  • Backup all the necessary data from your mobile to computer drive.
Steps to Root:
  • First you have to download Original Stock ROM for Samsung Galaxy S GT-i9000 as per your country and baseband version from below links:
  • After downloading, extract the files on desktop. If you are unable to find your region firmware then download from here
  • Download ODin v1.85 to your computer and extract the zip file.
  • Switch Off your phone, take out the battery and insert it back. Now boot your phone into Download Mode by pressing and holding the Volume Down + Home button together, and then press the Power button till you see the Android Construction logo. Once again press Power Up button to confirm.
  • Open “Odin.exe” (downloaded earlier) and connect your phone in download mode itself. If your phone is connected successfully the one of the ID:COM boxes will turn yellow/green.
  • Now select the files as per below instruction to install Original Stock ROM for Samsung Galaxy S GT-i9000. Files are found to be from the extracted folder.
    • Click on “PDA” and select file with “CODE” in its name.
    • Click on “Phone” and select file with “MODEM” in its name. (Note: Ignore this step if you don’t able to find such file)
    • Click on “CSC” and select file with “CSC” in its name. (Note: Ignore this step if you don’t able to find such file)
    • Click on “PIT” and select “.pit” file. (Note: Ignore this step if you don’t able to find such file)
  • Please make sure that only F. Reset Time and Auto Reboot options are checked on Odin. Don’t check any other boxes. (Note: Check Re-Partition box if you have selected “.pit” file)
  • Now, click on the “Start button” on Odin to start the installation process. Installation will take a few minutes to complete so please wait for the complete process.
  • Finally, when the installation process is completed successfully you will see the “PASS” message on Odin and then your device will reboot automatically. Now, you can disconnect your device from the computer.
Hurray! You have successfully installed Original Stock ROM for Samsung Galaxy S GT-i9000. So, it is the complete step by step guide on How to install Original Stock ROM for Samsung Galaxy S GT-i9000. If you encounter any problem then put your problem/queries below via comments and we will surely help you! Happy Flashing

Wednesday, June 26, 2013

How to Root HTC Google Nexus One

How to Root the HTC Google Nexus One

  • AMOLED capacitive touchscreen, 16M colors
  • 480 x 800 pixels, 3.7 inches (~252 ppi pixel density)
  • Multitouch Trackball navigation
  • microSD, up to 32 GB, 4 GB included
  • 512 MB RAM, 512 MB ROM
  • HSDPA 7.2 Mbps; HSUPA, 2 Mbps
  • Wi-Fi 802.11 a/b/g
  • microUSB v2.0
  • 5 MP, 2560Ñ…1920 pixels, autofocus, LED flash
  • Geo-tagging feature
  • Android OS, v2.1 (Eclair), upgradable to v2.3.6 (Gingerbread)
  • Qualcomm QSD8250 Snapdragon
  • 1 GHz Scorpion
  • Li-Ion 1400 mAh battery

How to root

  • You'll need the Android SDK installed. Follow Google's directions, and sing out if you need any help.
  • You'll also need Fastboot. Get it for your platform from HTC right here. Place the fastboot application in your SDK/platform-tools folder.
  • If you use Windows or a Mac, download and install PDAnet to your PC right here. This makes sure you have a USB driver that works in fastboot, and is the easiest way to do it.
  • Enable USB debugging on your phone (menu>settings>applications>development).
  • Next, power off your phone and hook it up to your computer. Hold the trackball, and press power to boot into fastboot mode.Once your phone powers up, open a command prompt and navigate to your SDK/platform-tools folder. At the prompt type the code: fastboot oem unlock
  • Choose YES to unlock your phone and void your warranty, and you're done. At this point you can install a custom recovery and/or a custom ROM with root enabled.
  • Enjoy Android the way it was intended -- free of hardware locks, Vcast, bing, and any of the other things that only make it worse

Tuesday, June 25, 2013

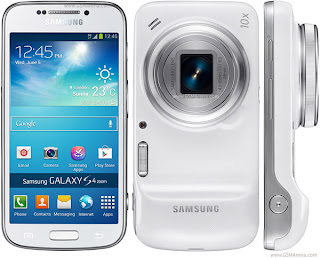
Samsung Galaxy S4 Zoom

Samsung Galaxy S4 zoom


Features:

GENERAL

  • 2G Network GSM 850 / 900 / 1800 / 1900 - all versions
  • 3G Network HSDPA 850 / 900 / 1900 / 2100 - all versions
  • 4G Network LTE (market dependent)
  • SIM Micro-SIM
  • Announced 2013, June
  • Status Coming soon. Exp. release 2013, Q3

BODY

  • Dimensions 125.5 x 63.5 x 15.4 mm (4.94 x 2.5 x 0.61 in)
  • Weight 208 g (7.34 oz)

DISPLAY

  • Type Super AMOLED capacitive touchscreen, 16M colors
  • Size 540 x 960 pixels, 4.3 inches (~256 ppi pixel density)
  • Multitouch Yes
  • Protection Corning Gorilla Glass 3

SOUND

  • Alert types Vibration; MP3, WAV ringtones
  • Loudspeaker Yes
  • 3.5mm jack Yes

MEMORY

  • Card slot microSD, up to 64 GB
  • Internal 8 GB (5 GB user available), 1.5 GB RAM

DATA

  • GPRS Yes
  • EDGE Yes
  • Speed HSDPA, 21.1 Mbps; HSUPA, 5.76 Mbps; LTE, Cat3, 50 Mbps UL, 100 Mbps DL
  • WLAN Wi-Fi 802.11 a/b/g/n, dual-band, Wi-Fi hotspot
  • Bluetooth Yes, v4.0 with A2DP, LE
  • NFC Yes
  • Infrared port Yes
  • USB Yes, microUSB v2.0 (MHL), USB On-the-go
CAMERA
  • Primary 16 MP, autofocus, Xenon flash
  • Features 1/2.33'' sensor size, geo-tagging, touch focus, face and smile detection, 10x optical zoom (24-240mm), optical image stabilization, HDR, panorama
  • Video Yes, 1080p@30fps
  • Secondary Yes, 1.9 MP

FEATURES OS

  • Android OS, v4.2.2 (Jelly Bean)

CPU

  • Dual-core 1.5 GHz Cortex-A9

GPU

  • Mali-400
  • Sensors Accelerometer, gyro, proximity, compass
  • Messaging SMS(threaded view), MMS, Email, Push Mail, IM, RSS
  • Browser HTML5
  • Radio FM radio
  • GPS Yes, with A-GPS support and GLONASS
  • Java Yes, via Java MIDP emulator
  • Colors White
  • S-Voice natural language commands and dictation
  • Dropbox (50 GB storage)
  •  Active noise cancellation with dedicated mic
  • TV-out (via MHL A/V link)
  • SNS integration
  • MP4/DivX/XviD/WMV/H.264/H.263 player
  • MP3/WAV/eAAC+/AC3/FLAC player
  • Organizer
  • Image/video editor
  • Document viewer
  • Google Search, Maps, Gmail,
  • YouTube, Calendar, Google Talk, Picasa
  • Voice memo/dial/commands
  • Predictive text input (Swype)

BATTERY

  • Li-Ion 2330 mAh battery

How to Increase internal memory of HTC Pico

How To Increase Your HTC Pico's Internal Memory Using Link2SD


A simple method to increase your pico's internal memory is explained here.  We use link2sd  ( an android app available for free in playstore) to do the process.


What is Link2SD?

 Link2SD uses the second partition of your SD card to use it as an additional segment of internal memory.


Warning:

  • Phone Must Be Rooted . Check:- How To Root HTC Explorer Pico
  • Remove App2SD if you have it installed
  • Move Apps From SD To internal to link afterwards
  • Install Link2SD, no need to run it.
  • No Need to format your SD card, just have atleast 1 GB free space. 
  • Stock ROM Supports FAT32 as primary. Those with kernal update having ext2,ext3 .. can use it also.

Let's Begin:

  • Download MiniTool Partition Wizard From Internet.
  • Run Minitool Partition Wizard
  • Plug in your SD card using Card Reader ( USB Mounting is not trustworthy). You can view your SD card from Minitool partition ( try to reload if not present)

  • Next right click on your SD card. From the pop up menu select " Move/Resize". It will bring you to a new section.


  • Now move the memory slider to get min 512MB to 1024MB on " Unallocated Space", as shown in figure. I have created 1026.66 MB unallocated space. If you have a bigger SD card of 4-8-16-32 GB sizes, better go for 1-4 GB space. i was using a class 4 memory card ( 2GB ) for demonstration. Finally press OK.


  • Now you have to create a new partition on your unallocated space. For that right click on the new space and select" Create". (Right Click>>Create). It will show a pop-up message, just ignore it and press "Yes".  ( It just shows that after you partition on the primary can be seen on Windows. You can view it on MiniTool)


  • This will lead you to new window , where you have to partition your newly created space. Select a name for your drive, Choose "Create As"- Primary, then select "File System"- FAT32. Leave "Cluster Size"- Default.  Finally Press OK.

  • Then press " Apply " on Top Left Corner. It will give a warning, press OK and continue.

  • It will take Some Time to create and resize partition. Wait till it finishes.

  • You have successfully created the secondary partition for Link2SD. Reboot your device and follow the next processes on HTC Explorer.

Now Lets Head over to Link2SD

  • Open Link2SD on your a310e, you will be welcomed with a screen like this. Now Select" FAT32 "


  • Next you will encounter a SuperUser Request. Press Allow button on the screen.


  • Now you will get a message showing that mount script have been successfully created on your SD card. You need to restart your device. Press OK at the menu.


  • Now you will recieve the old Power options. Choose Restart. Once restarted open Link2SD and click the Menu button and go to "Storage Info". You can see your Internal memory, and the two SD partitions.


  •  Now use Multi Select and select all the app to transfer. You can Select the Apps one by one also.


  • Once you have selected all the required apps press "Actions" button. It Will Give You a new window with the following options as in figure. Select " Create Link"

  • Next you will recieve a " Create Link? " Window. Tick all the three options and press OK.


  • Once done you can see the selected apps have been linked to your SD card ( see an orange colored text on top of the app). Next Reboot Your Phone.


  • After Rebooting you have to configure your Link2SD settings. Go to Settings by pressing the menu button and configure how you would like Link2SD to work. 


There You go! You have successfully installed and configured Link2SD to increase  your internal memory.

Sony Xperia Z Ultra

Sony Xperia Z Ultra heading to Three UK

UK carrier has confirmed they will be carrying the Ultra on their Ultrafast network

There's a whole lot of ultra going on at Three UK. The UK carrier has announced they will be offering the brand new Sony Xperia Z Ultra on their Ultrafast network. And, that's about all we do know. They have talked about all-you-can-eat data, so it's presumable that you'll be able to pick the Ultra up on Three's highly competitive One Plan. Three is the first out of the gate with an announcement for Sony's new 6.4-inch goliath, and we're sure they won't be the last. 

Monday, June 24, 2013

A wonderful device Galaxy Pockect

GALAXY Pocket (S5300)

Samsung GALAXY Pocket is an entry level smartphone specially made for you! The smart device is compact and light with superior functionality and outstanding performance. Powered by 832MHz processor that you can surf the web with speed, enjoy fast content downloads and flawless real-time interaction with friends via popular social networking sites on the go. Running on Android™ v2.3 OS and featuring Samsung’s TOUCHWiZ user interface that is easy to use, offering quick access to most features as well. Get started and enjoy ultimate user experience with this smart device!


Specifications 

Display


  • 26K Color TFT Full Touch Display
  • Resolution: 240 x 320pixel
  • Size: 2.8"

Platform


  • Android v2.3.6 (Gingerbread™)
  • TOUCHWiZ User Interface (up to 7 pages widget desktop)

Processor


  • 832MHz

Battery


  • Talk Time: Up to 17Hrs (2G), 5.6 Hrs (3G)
  • Standby Time: Up to 800 Hrs (2G), 500 Hrs (3G)

Design


  • Dimension (WxHxD): 57.9 x 103.9 x 11.98mm
  • Weight: 97.2g
  • Color+: Black, Pure White

Band


  • UMTS (900 / 2100 MHz) + GSM (850 / 900 / 1800 / 1900 MHz)

Memory


  • Built-in Memory: 4GB
  • User Memory: 3GB (Allocated into various categories)
  • Support microSDHC™ card (up to 32GB)

Camera


  • Resolution: 2.0 Mega-pixel


LG Optimus G2

LG Optimus G2 could launch in August


LG has confirmed it will be holding an event on 7 August in New York, with speculation pointing to the LG Optimus G2 being the headline act.

We're still waiting for an image (that's the LG Optimus Pro) but details have been sent to the TechTastic site, which points to a flagship phone running on the new (and powerful) 2.3GHz quad-core Snapdragon 800-soc processor and with buttons on the rear of the phone. That should be interesting to see.

Not only that, the phone will have a 5-inch 1080p screen, Adreno 330 GPU, 2GB RAM, a 13-megapixel camera and Android 4.2.2 Jelly Bean with LG’s own Optimus interface.

It will be one of a trio of phones believed to be launching at the event, the others being the mid-range LG Optimus L9 II with 4.7-inch 720p display, 1.4GHz Qualcomm Snapdragon 400 processor, 8-megapixel camera, NFC and Android 4.1.2 Jelly Bean, along with the low-end LG D500 with a 1.2GHz Qualcomm Snapdragon 200 processor, 540 x 960 display, NFC, 5-megapixel camera, Bluetooth 4.0 and Android 4.1.2 Jelly Bean.
We would expect to see some images before that launch, but if not, all should be revealed in a matter of weeks

Nokia Lumina 925

Nokia Lumina 925


Specificatons:

  • Main camera sensor: 8.7 MP PureView
  • Display size: 4.5 PureMotion HD+''
  • Processor name: Qualcomm Snapdragon™ S4
  • Maximum 3G talk time: 12.8h
  • Maximum 3G standby time: 440h
  • Music playback time: 55h
  • Touch screen technology: Super-sensitive touch


Display

  • Display size: 4.5 PureMotion HD+ ''
  • Display technology: AMOLED 
  • Touch screen technology: Super-sensitive touch 

Photography

  • Main camera sensor: 8.7 MP PureView 

Power management

  • Maximum 2G talk time: 18.3 h
  • Maximum 3G talk time: 12.8 h
  • Maximum 3G standby time: 440 h
  • Music playback time: 55 h
  • Wireless charging: Yes, with accessory cover

Processor

  • Processor name: Qualcomm Snapdragon™ S4 
  • Processor type: Dual-core 1.5 GHz 

Rooting Samsung Galaxy Grand Duos GT-i9082

Root Samsung Galaxy Grand Duos GT-i9082

Phone features:

  • Android v4.1 (Jelly Bean) OS
  • 5-inch Capacitive Touchscreen
  • 8 MP Primary Camera and 2 MP Secondary Camera
  • Full HD Recording
  • Expandable Storage Capacity of 64 GB
  • Multi Window
  • Dual Standby SIM (GSM + GSM)
  • 1.2 GHz Dual Core Processor

Warning: 

Rooting void warranty of your phone. Please backup all your data before doing this. Be careful with each steps. Please note that it is quite easy to do too.


Lets Begin:

Step1


  • Download and setup ADB drivers for your device 

Step2

  • Download the recovery-Recovery
  • Download odin 3
  • Turn of your device and go to odin mode [ Vol down + power + home button (all at the same time) ] release it when you see GT-i9082 logo
  • Press vol up to confirm 

 Step 3

  •  Now that you are in odin mode connect your device via usb cable ! 
  • Now open Odin3 3.04 that you have downloaded !
  • If there is a pop-up like Installing ADB drivers let it get finished it is usually updates  

  •  Make sure the COM : xx (xx is usb port number it can be any number so dont worry about it,just verify COM is lit up)
  • Extract the CWM-touch_i9082_chotu.tar.zip ! Now select PDA and browse to where you have extracteded CWM-touch_i9082_chotu.tar.md5 and select it


  • Click Start
Now you have successfully created a CWM touch Recovery
Note: 
 "If any one is getting md5 hash value failed while flashing rename "CWM-touch_i9082_chotu.tar.md5 to ""CWM-touch_i9082_chotu.tar" (remove the .md5) and then flash it !"

How To Root:


  • Download SuperSu 
  • Copy that to externel sdcard (NOT INTERNAL ! )
  • Power off your device and press vol up + power + home button (all at once)
  • Select install zip from sdcard --->choose zip from sdcard ---> scroll down and select UPDATE-SuperSU-v1.05.zip  
  • Done ! And you are ready to go  

How To Unroot:

  • Download The Uninstaller File given above.
  • If you want to unroot keeping CWM alive then flash only the Uninstall_root_SGG.zip (like you flashed SuperSu.zip earlier)
  • There its simple!

How to root the HTC Explorer


HOw to root the HTC Explorer A310e(Pico)

HTC Explorer is a great budget android phone. Equipped with a lot of candy features. If you want to select your first android touch phone and budget tight then,explorer is the best and fine phone set for you. It is the superb first android Phone which is economic and attractive.It is powered by a 600MHz processor ,Adreno 200 GPU, 3.2MP camera (no flash) and many more. So this cute little phone has a little bad side-a low 90MB linternal memory. it has some pre-installed apps that cannot be removed. How to remove them?
Rooting is the only way. Let's see how to root it. Its fast and simple-yet effective.


Rooting:

For rooting process the following process should be implemented accordingly.
  • First install HTC sync on your PC , which can be downloaded from HTC site.
  • Unlock your Phone's bootloader. For this go to www.htcdev.com.
  • From Bootloader section select your device. But HTC explorer isn't listed on the site. Just select " All supported Models" and follow the steps.
  • Now 'Add A Recovery". This will allow you to install .zip ROMs. You can access to it in the menu android phone after removing and inserting the battery and pressing " volume down" and "Power" buttons simultaneously.(Other phones have different button combinations).
  1. Download HTCa310eRecovery.zip from this recovery file - HTCa310eRecovery.zip
  2. Extract all the files to any place on your PC like E:/explorer
  3. Run the recovery.bat with phone in fastboot mode. (first option in the "3 android menu") and connected with USB.
If you have done all this correctly you have successfully installed the recovery files. You can now install any compatible .zip ROM or app.

It is the time to root the phone now
  • Download this file - compatible.zip
  • Place this file in your memory card.
  • Go to recovery mode - ( " Volume Down"+"Power")
  • Install superuser zip file with the option "install.zip from SD" from the recovery menu.
Finally the rooting procedure is successful. Have fun.............

Warning: Rooting makes your warranty void. This is simple guidelines presented by experts. Mistake might be present. Wrong doings can brick your phone.

Recommended: Install "Link2sd" for moving your apps to SD card. This will help you to move apps to partitioned SD card

HTC Explorer Pico

HTC Explorer (Pico) A310e

Specifications:

  • Android gingerbread phone
  • 3.2 Inch capacitive touchscreen with HTC sense UI
  • 3G, WiFi and bluetooth connectivity
  • 3 MP camera with video recording feature
  • FM Radio
  • Active lockscreen
  • 600 MHz Processor
  • 512 MB Ram
  • 32 GB expandable memory
For rooting your HTC Explorer (Pico) A310e Please visit the post: How To Root HTC Explorer Pico
For increasing the Internal Memory of  HTC Explorer (Pico) A310e Please visit : How To Increase Your HTC Pico's Internal Memory Using Link2SD

Wednesday, June 5, 2013

png


Twitter Delicious Facebook Digg Stumbleupon Favorites More